How to Do a DIY Steam Facial At Home
May 30, 2023
Tips for an At-Home Steam Facial
Steam Before Your Facial
Whether you’re at home or at the spa, always steam before your facial, never after. Steaming before prepares your skin to soak up all the benefits in the skincare products you’ll use — from serums and masks to moisturizers — while steaming after can potentially wash them away.
Drink Lots of Water
Drink a lot of water before your steam facial and avoid alcohol. This rule is especially important when steaming at the spa, but it can apply to home facials, too. Steam rooms naturally make you sweat, which can lead to dehydration if you’re not drinking enough water or drinking dehydrating liquids such as alcohol.
Keep Time in Mind
Be sure you don’t steam for longer than five to 10 minutes.
Ready to steam? Here are eight steps that will take you through the entire process.
How to Do a Steam Facial At Home
Step 1: Cleanse and Exfoliate
Before you steam your face, make sure your skin is thoroughly cleansed. Consider washing your face with a detoxifying, pore-clearing cleanser, like the Kiehl’s Rare Earth Deep Pore-Minimizing & Polishing Powder Cleanser, which removes makeup, dirt and other impurities.

Step 2: Prep the Steam
Bring a small pot or bowl of water to a boil in the microwave or on the stove. You'll only need a few cups of water. When the water is thoroughly heated, carefully transfer it to a ceramic bowl and allow it to cool down a bit. Tap water works fine for this, but distilled or spring water is easy to find if you’d like to use that instead.
Step 3: Add Essential Oils
To enhance your DIY steam facial and truly transform your bathroom into a spa, add essential oils to your water. Essential oils can deliver a relaxing aroma and make your steam facial even more enjoyable. Three to five drops of an essential oil are more than enough. Before steaming your face, decide on the aromatherapy experience you’d like to have and choose your essential oils accordingly.
To feel invigorated: Try citrus-scented essential oils
To feel relaxed: Try lavender or chamomile essential oils
To feel uplifted: Try rose essential oil
For the ultimate spa experience: Try eucalyptus oil
Step 4: Steam Your Face
Stand over the bowl or container with your face about a foot away from the steam. Drape a sheet or towel over your head and shoulders to create a steam tent. For five to ten minutes (no longer), inhale and exhale slowly as you let the warm, soothing steam hit your face. To avoid irritation, keep your eyes closed. If you feel uncomfortable at any point, remove the towel and move away from the steam.
Step 5: Add a Mask
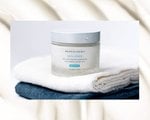
After you’ve steamed, you can clarify your skin further with a clay face mask or cleanser to clear out any lingering impurities. We love the SkinCeuticals Clarifying Clay Mask For Acne Prone Skin or the Youth to the People Yerba Mate Resurfacing Energy Facial.
Step 6: Use a Toner
Once you’re done with your post-steam facial mask, sweep a gentle toner like the CeraVe Hydrating Toner all over your skin with a cotton pad. If you have dry skin, try the Thayers Milky Hydrating Face Toner With Snow Mushroom and Hyaluronic Acid.

Step 7: Rub an Ice Cube On Your Face and Neck
To contrast the warmth during the steam facial, follow with an ice cube facial to cool off.
Step 8: Moisturize
Every good skincare routine involves moisturizing. For normal to dry skin, reach for something nourishing yet lightweight, like the Youth to the People Adaptogen Deep Moisture Cream. If you have an oily complexion, try the La Roche-Posay Toleriane Double Repair Matte Face Moisturizer For Oily Skin, which will help lock in hydration while keeping excess shine at bay.
Editor’s note: While at-home steam facials can be a relaxing treat, they shouldn’t be a daily occurrence. Talk to a board-certified dermatologist about the right frequency for your skin.
Read more
EXPLORE BY TOPICS AND BRANDS
- lifestyle
- DIY Skin Care
- video-embed
- Embedded Video
- SkinCeuticals
- Youth To The People
- CeraVe
- Thayers
- La Roche-Posay


